
Every transaction in QuickBooks Online has to answer four questions: who it's with, when it happened, what it was for, and how much. There are four main lists to organize that info and use it consistently across your books. This helps track transactions that share data.
New QuickBooks Online users often skip list setup and start entering transactions directly, typing a customer's name fresh each time or picking whatever account looks close enough. That works for the first few entries, then breaks down: duplicate customer records appear, a sale posts to the wrong income account, and the Profit and Loss statement stops clearly telling the story of what actually happened in your business' sales and expenses. Lists exist so the who, what, and how much on a transaction get answered correctly each time, and their associated details entered from a saved record, instead of being re-entered or re-guessed each time. This guide covers the required info a transaction needs, then what each list does to keep the answers to them organized.
The Four Questions Every Transaction Answers
Before QuickBooks lets you post a transaction, it needs the answers to four questions. A transaction that looks wrong later usually has the wrong answers to these questions.
- Who — the customer, vendor, contractor, or employee tied to the transaction.
- When — the date, which determines which report period the transaction appears in. That's the date the transaction occurs, not the date you get around to recording it in QuickBooks. A check you wrote in December will affect December's numbers in your books, as long as you enter the correct December date when you record it.
- What — the product, service, or account line the money is tied to.
- How much — the dollar amount.
Entering the who and the what from your list, also pulls in details automatically such as a customer's address and payment terms, or an item's description and rate. That's what makes lists well worth setting up before entering transactions. There are four main lists every business should set up as soon as possible: Customers, Vendors, Products and Services, and the Chart of Accounts. (And if you run payroll, the Employees list is also a good one to include in the startup).
The Customer List
The Customer list, under Sales, shows active clients and their balances. You can filter it a few ways, for example, just show overdue accounts. You can customize the view with additional columns like the customer's email address, and sort it by selecting any column header. (Selecting the same header again reverses the sort, useful for pulling the highest overdue balance to the top). Selecting a specific customer opens their contact details and full transaction history, with an Edit button to update information like a changed address.
Deactivating a customer, from that same Edit menu, removes them from the active list view without deleting their transaction history. This can be useful for a client who hasn't ordered in years but whose past invoices still need to exist for tax records. You can always find and reactivate an inactive customer through the list's "Include inactive" option, in its own gear menu. And of course, setting up the list doesn't prevent you from growing your business. Add new customers directly from the top corner of the list view, or on the fly as you enter a new transaction.
The Vendor List
The Vendor list, under Expenses, works the same way as the Customer list. It's sortable, filterable, and customizable by column, with the same add, edit, and deactivate options. Recording a vendor takes a few seconds and pays off every time you enter a bill or expense after: it's what lets QuickBooks show you, at a glance, how much you've spent with a given landlord, supplier, or contractor over any stretch of time, instead of digging back through receipts to piece it together. A separate Employee list holds payroll-specific details like deductions, pay rates, and PTO.
The Products and Services List
The Products and Services list organizes what the business sells, so when you create an estimate or an invoice, you select the items you're selling from the list, instead of trying to remember what you called it last time, how much you're charging, and whether it's taxable every time. When you set up an item, you enter a name, the type, a sales price, and a tax status; more importantly, you select an Income Account, which tells QuickBooks where that sale should land on the Profit and Loss statement. This keeps your sales forms and your reports clean and consistent.
Items come in three types:
- Services and non-inventory items — don't track quantity on hand.
- Inventory items — track real-time quantity on hand. Available on QuickBooks Online Plus and Advanced only.
- Bundles — group several items into a single line, like a door and its installation sold together on one invoice.
The Chart of Accounts
The Chart of Accounts is the fourth list, and the backbone of your books. Every account feeds either the Balance Sheet or the Profit and Loss statement. A "BAL" or "P&L" notation next to each account shows which statement it feeds. It answers the "what" on a transaction directly when you categorize a bank transaction, and indirectly through the Income Account on a Products and Services item.
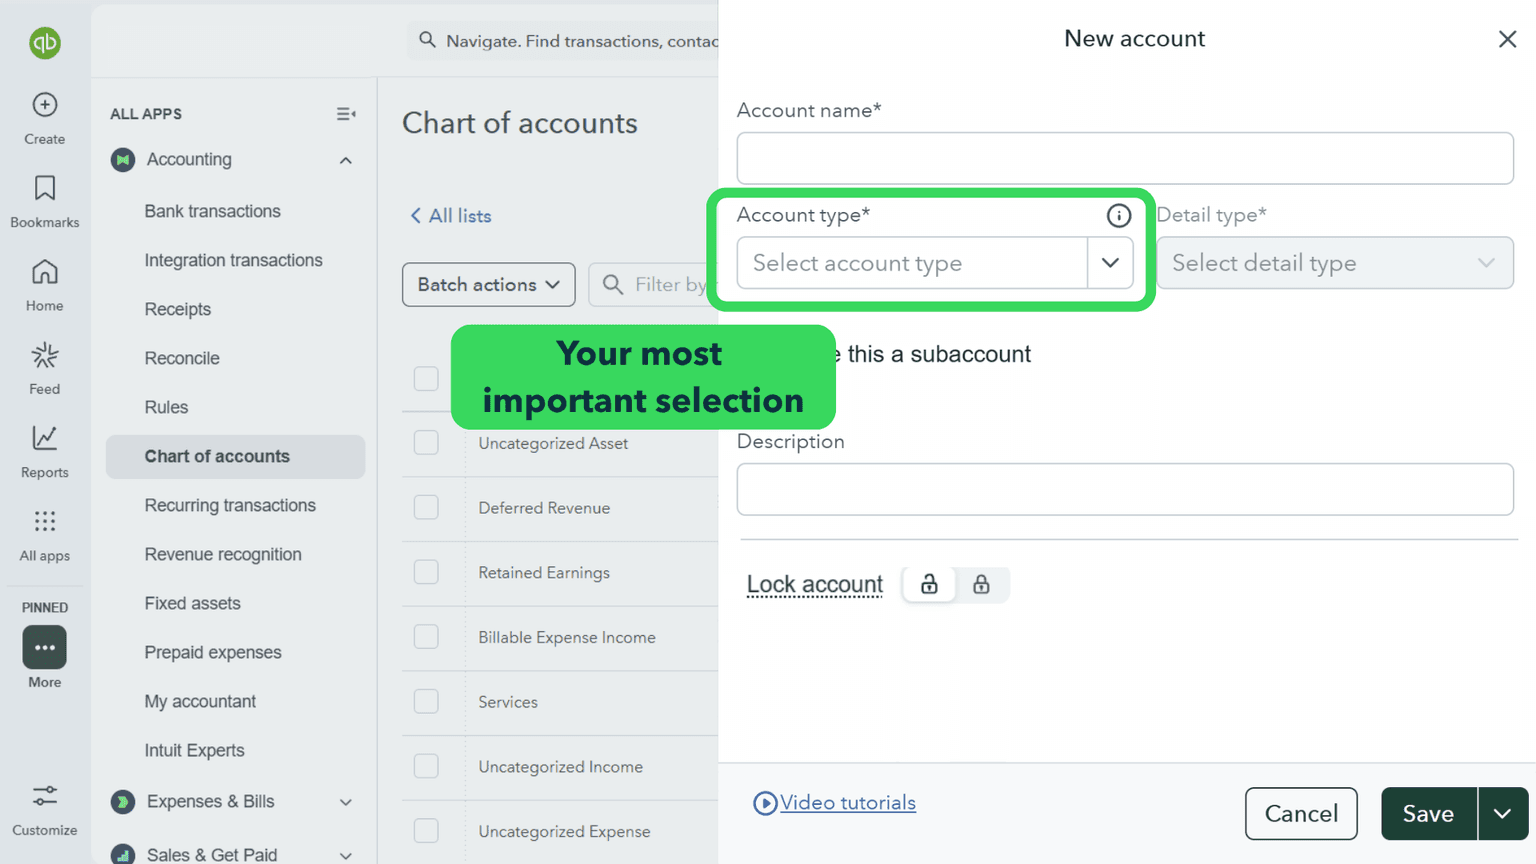
Setting up a new account works the same way as adding a customer, vendor, or product. You enter a name, an account type (bank, credit card, liability, income or expense and so forth), and a detail type that specifies what the account tracks further. There's no wrong detail type to pick, just the one that fits best. A bank or credit card account also asks for an opening balance: the date to start tracking from, usually the beginning of the business's tax year, and the balance (or amount owed, for a loan or credit card) on that date. Reviewing the full list with whoever handles the business's taxes, before it fills up with transactions, is worth the time.
Your Lists Are Ready Once
A new QuickBooks Online file is ready to move on to bank feeds and sales once:
- You've entered active customers and vendors on the appropriate list.
- You've attached each Product and Service item to the correct Income account.
- You've reviewed the Chart of Accounts with whoever handles the business's taxes.
- You can name the who, when, what, and how much for a transaction before you try to record it.
Backed by Intuit since 1998. Every article on this blog is written by the same certified instructors who teach our live classes and self-paced courses.
The right next step
QuickBooksTraining.com's QuickBooks for Beginners course walks through list setup and the Chart of Accounts item by item, with an instructor available if an Income Account or item type still isn't clear.
Learn QuickBooks the right way
50+ self-paced courses, live classes every weekday, and certification prep.
Explore more training on Getting Started
Courses and videos from QuickBooksTraining.com


QuickBooks Instructor
“The chart of accounts is hands down one of the most important lists in QuickBooks.”