Chart of Accounts 101: How to Set It Up the Right Way

Published January 22, 2026
The Chart of Accounts. If you're running a business, especially if you're a founder or an entrepreneur just diving into the messy, glorious world of finance, this term might sound dull, technical, or like something you can "figure out later." We're here to tell you: Do not figure it out later.
Setting up your Chart of Accounts correctly is perhaps the single most critical, foundational step you take when establishing your financial systems. Rushing it is tempting; it feels like administrative busywork. But rushing into recording transactions without setting it up is the financial equivalent of building a skyscraper on a cracked foundation. It will create future problems, complicate tax season, and obscure the financial insights you need to grow.
What Exactly is a Chart of Accounts?
Think of the Chart of Accounts as the organizational map for every financial transaction that flows through your business. It is an ordered list of every account in your general ledger, designed to categorize every penny you earn and spend.
Every entry you record — whether it's income, expenses, asset purchases, or debt payments — must be assigned to one of the accounts on your Chart of Accounts. This systematic categorization is what makes your financial statements accurate and meaningful.
The Importance of Account Types
Understanding the five core account types is the bedrock of setting up your Chart of Accounts (COA). Why? Because the account type dictates two critical things:
- Where the account appears on your financial statements (Balance Sheet or Profit & Loss Statement).
- How transactions affect the account balance (i.e., whether a debit or a credit increases or decreases it).
If you assign the wrong type, your financial reports will be wrong, regardless of how accurately you entered the transaction amount. For instance, if you receive a bank loan and mistakenly categorize it as Income instead of a Liability, your Profit & Loss statement will drastically overstate your profit.
The Five Core Account Types
The accounts you need for any business, regardless of industry or size, are built upon five fundamental account categories.
- Assets: What your company owns (cash, receivables, equipment). Assets make up the first part of your balance sheet.
- Liabilities: What your company owes to others (payables, loans, deferred revenue). Liabilities are another section of the balance sheet.
- Equity: The owner's stake in the company (owner investment, retained earnings). When you add equity and liabilities together, they equal your assets.
- Revenue/Income: Money your company earns from operations (sales, service fees). Income is one half of your profit & loss statement.
- Expenses: Costs your company incurs to generate revenue (rent, salaries, marketing). Expenses are deducted from income to determine your net income.
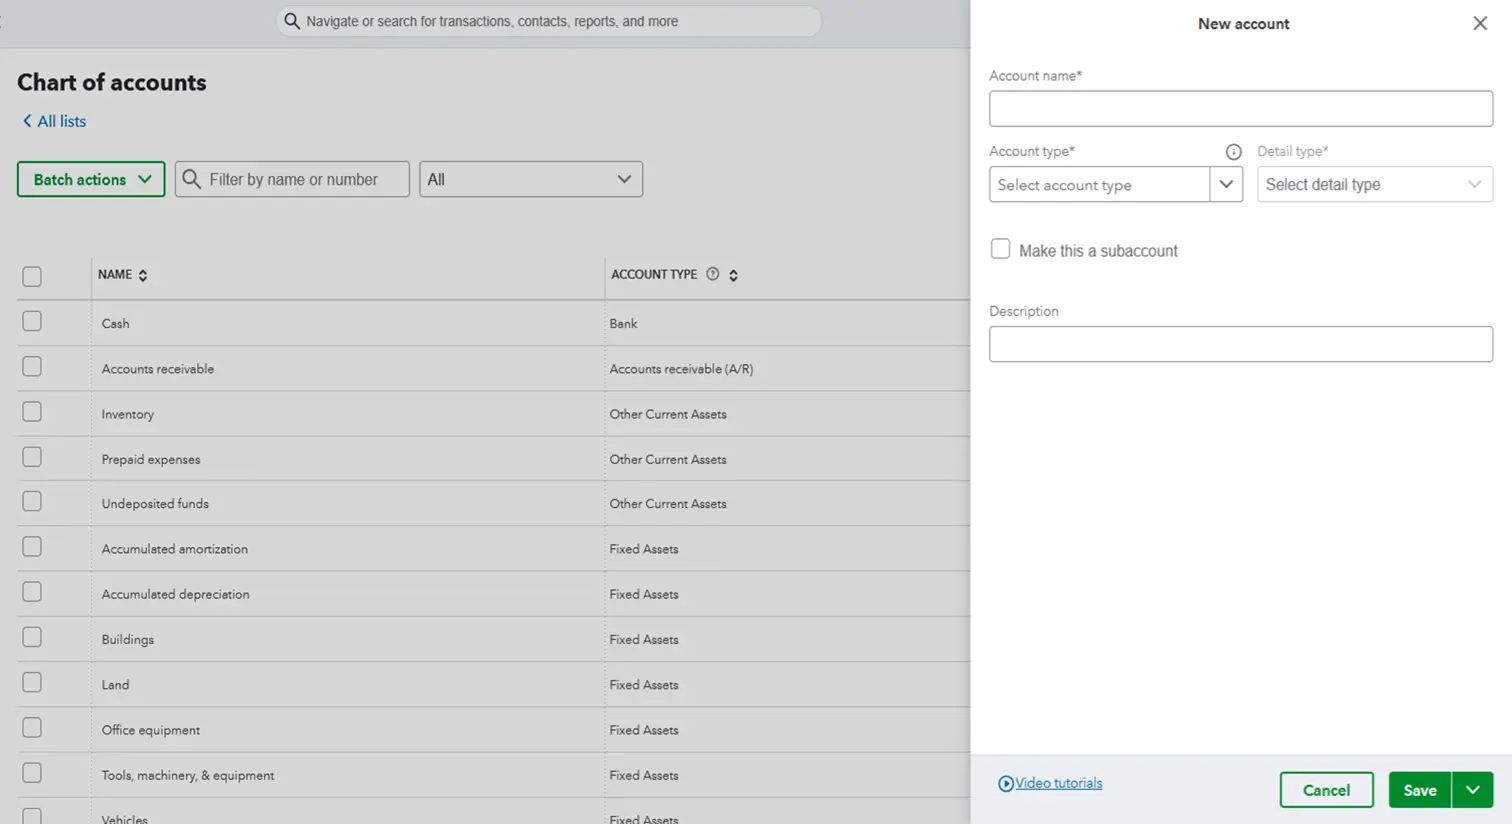
Step 1: Naming Your Accounts for Clarity
Once you know the types, the next step is assigning names. The best names are meaningful and easy for you and your team to understand. There is no secret, standardized list of names.
Good Naming Principles
- Be Specific but Concise: Avoid names that are too long (e.g., "Office Papers, Pencils, and Other Supplies"). A short, descriptive name like "Office Supplies" is better.
- Use Standard Terms When Applicable: Some accounts have industry-standard names, and you should use them. For example, "Accounts Receivable" (money owed to you by customers) and "Accounts Payable" (money you owe to vendors).
- Align with Real-World Accounts: Your books should mirror reality. If you have separate Checking and Savings accounts, you must create a separate entry for each one.
What to Avoid
- Vague or Useless Names: An account called "Stuff I Buy" is not helpful for running a business or filing taxes.
- Overly Detailed Accounts: You don't need a separate expense account for every vendor you pay or for every single item you buy. Generally you can use your accounting system's tracking features (like vendor or product lists) for that level of detail.
Step 2: Utilizing Subaccounts for Detail and Summarization
A key organizational tool for your Chart of Accounts in QuickBooks is subaccounts. Subaccounts allow you to track more detail while still providing a clear summary on your financial reports.
A parent account is the general category (e.g., "Insurance"), and the subaccounts provide the breakdown (e.g., "Equipment Insurance," "Property Insurance," "Workers Comp"). On financial statements, you can often collapse the parent account to see only the total, or expand it to view all the underlying subaccount details.
Step 3: Deciding on Account Numbers
While not strictly necessary for modern bookkeeping software, using account numbers is a classic accounting practice that can still provide organizational benefits.
- Standardization: Accountants often use a standardized numbering scheme across different clients, making it easier for them to remember the correct account for a transaction.
- Easy Entry: You can quickly enter a transaction using the account number instead of typing out the full name.
- Custom Sorting: Account numbers override alphabetical sorting, allowing you to organize your Chart of Accounts and reports in a specific, logical order that you prefer.
Final Setup Checklist
Before you begin recording your first transaction, ensure your Chart of Accounts meets these criteria:
- All Five Core Account Types are represented.
- You have sufficient detail to file your tax return easily (e.g., separate accounts for travel, meals, fuel).
- Account names are clear, concise, and meaningful to everyone in the business.
- You have a separate account for every real-world bank account (checking, savings, etc.).
- You use subaccounts to provide detail for internal management without making the main reports overly long.
- You have worked with your accountant to confirm the accounts they will need for year-end reviews and tax adjustments.
Put Your Chart of Accounts Knowledge Into Practice
Our comprehensive QuickBooks training covers Chart of Accounts setup, transaction recording, and financial reporting — everything you need to build a solid financial foundation.
Explore Our Bookkeeping CourseWant to learn more about QuickBooks?
Our certified instructors can help you master QuickBooks with live classes, self-paced courses, and 1-on-1 help.
Explore Training Plans